
To see if this custom-fit item will work for you please tell us what vehicle you'll use it with.


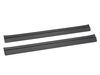
B&W is known for building hitches people trust. Made in the USA and made to last. This one bolts right on, with the receiver just below the bumper for easy access. Powder-coated steel holds up against rust, grime, and plenty of road trips.
With a 750-lb tongue weight, this hitch is ready for your multi-bike rack or a fully loaded cargo carrier. Whether you're hauling electric bikes or extra gear for a weekend trip, it handles the weight with ease.
The 6,000-lb towing capacity makes it ideal for hauling small travel trailers, utility trailers, or lightweight boat trailers, giving you the flexibility to take your adventure wherever you want.
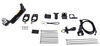
This custom-fit hitch lines up with factory holes, and the 3-piece bolt-on setup makes installation quick and drill-free with no special tools or welding needed.
California residents: click here
Videos are provided as a guide only. Refer to manufacturer installation instructions and specs for complete information.
Hey there neighbor, it's Kevin here with etrailer and today we're gonna be taking a look at and showing you how to install the B&W Trailer Hitch Receiver here on our 2023 Hyundai Palisade. The Hyundai Palisade is a great family car. It has plenty of room for plenty of people with that third row seating but doesn't have a lot of cargo space once you have all of your friends and family packed into the vehicle. So you're gonna need a way to haul all your gear. The best way to do so is with a trailer hitch, so that way you can throw on that cargo carrier, that bike rack, or even tow a small trailer as long as you also pick up some wiring so that way you can remain street legal. Now when you are trying to haul all that gear, there's a couple of things to consider.
First one being your capacity. So if we are hauling a trailer, we wanna make sure that we're staying within the capacity of not only the trailer hitch but our vehicle as well. This specific trailer hitch is gonna have a 6,000 pound gross towing weight capacity, which is probably gonna be above what your Palisade can handle, so you will wanna make sure that you're double checking that owner's manual and staying within the capacities of the vehicle. Now for the tongue weight, which is gonna be the downward force on the inside of our receiver tube, and that is gonna be those bike racks and those cargo carriers, that is gonna be a 750 pound rating, which is pretty huge for this style vehicle and trailer hitch. So you're gonna be able to haul a lot of gear back here, but you might want to keep in mind that now maybe that rear suspension is gonna sag a little bit more.
So you want to keep an eye on that and make sure that you're not gonna bottom out and end up damaging your vehicle. Now when we also have those on, there's a couple of measurements that are gonna be pretty important because we don't want to hit a steep incline or decline and then have the shank or any other part of our accessory scraping the ground and getting damaged. So for our ground height, we typically wanna see about 12 inches of clearance from the ground up to the top of the inside of our receiver tube. Now with ours we're looking at right around 13 and three quarters, so that's well above that 12 inch mark. So we're not gonna need to use an adapter, we should have enough ground clearance.
If you are in that situation where you did need to use an adapter, you also are going to now be leveraging that weight further out. So that adapter is gonna reduce the overall capacity by 50%. So you want to definitely keep that in mind when you're hauling things around. Now a lot of accessories also fold up so that you can kind of shorten up that overall length of your vehicle and the accessory. Well, every now and then you might run into an issue where maybe that folding accessory folds a little too close to the car and it can end up damaging your fascia or your lift gate.
So the way to figure that out before you even go and actually physically test it would be to simply just measure from the center of your hitch pin hole out to the furthest point of your fascia, which is right here, right at the lift gate. And that is sitting at right around three and a half to four inches. So what we would need to do is just go over to our accessory. We would look at the center of the hitch pin hole to the closest part of that accessory once it's folded up, and then we can measure that distance to see if we have enough clearance. Now our receiver tube opening is gonna be two inches by two inches, which is pretty standard for most accessories out on the market. Now there are gonna be some one and a quarter inch accessories and you can get a reducer sleeve here at etrailer that'll slot into the hole here and help drop that down to that one and a quarter inch sizing without reducing your capacity. One other thing that you're gonna wanna pick up as well is a hitch pin and clip because it's not gonna be included with your trailer hitch. I like to go with one that's gonna be anti-rattle and also locking so that way I don't have to worry about my cargo shifting or rattling around and getting damaged while it's on the back of my vehicle if I'm going over a rough terrain or somebody taking off with it because they didn't have a lock and someone could easily just come over and pop the pin and then take off with my accessory. Now if we're gonna be towing a trailer, safety chains are also going to be a must. So if we take a look with our tow loops, it's a pretty tall slotted section here. Gives us plenty of room for our S hook to go on either way, no problems there, no bind up. Now with the larger clevis style, that one's also kind of sitting on there real nice. I'm not really getting bound up. If you can hit the other way. Yep, no problem. So with this specific tow loop set here, you're not gonna really have an issue. Now as far as installation goes, every single trailer hitch for the Hyundai Palisade is super easy to install. Honestly, there's only just very minor differences between each brand, a little bit in terms of the finish, just the overall design and then also your tow loops. But for the most part, every single hitch that you're gonna get is gonna have that hidden cross tube with just the receiver tube poking out below here. So it's a super easy install 'cause you're just popping four bolts in horizontally, four bolts in vertically and then you're honestly good to go. The only thing you really need specialty wise is just a torque wrench so that way you can torque each one of your bolts down to the proper spec. So if you don't have one of those, definitely feel free to pick one up here at etrailer or you can use our Dealer Locator and find a shop near you to get it professionally installed. And they'll also have that torque wrench to get it torqued down for you. Now if you're wanting to do this yourself and you have that torque wrench, stick around and I'll walk through the process. Starting off our install, I've already lowered our spare tire. I've got that kind of just hung up there to keep it outta the way. I'm gonna now take a Camstrap and I'm gonna run it from one coil spring over to the other. And what that's gonna do is help provide support for our exhaust because we're gonna be removing the rubber isolators. There's gonna be three of them, one right back here, there's one right by our passenger side rear tire, and then another one right at the end of our exhaust right here. So what I'm gonna do is spray those down with a little bit of silicone lubricant, help them, transition off just a little bit easier. And then you can either grab a pry bar or in our case we have a specific tool for removing rubber isolators and it's just a little prong with a flat piece so that we have something to kind of press against. So we'll sit here and pop each one of these off. (tool clanking) (tool clanking) And then our exhaust is gonna rest on our Camstrap. Now over on our driver's side we're gonna have this plastic cover here and this is gonna need to come down. It's gonna have three push pins and then two plastic nuts that are kind of up there. So I'm gonna use a 14 millimeter socket with an extension. And with those plastic nuts, you kind of have to also apply a little bit of pressure. So I would honestly start by pulling out these three push pins first so that way you don't have it potentially pop back up into place once you already have it out. And then kind of just pry on it a little bit, not like a ton of pressure or anything, just enough to keep it nice and firm as you twist that down and it should start working its way off. (tool clanking) There we go, and we'll set this aside. Now on both the passenger and driver's side frame rail, you're gonna have two vertical holes and those are gonna have weld nuts in them. We're gonna clean those out so that way when we go to put our hardware in, we don't have to worry about it getting caught. So I'm gonna spray a little bit of penetrating oil up in there and just take my wire brush and clean out the threads. (brush rustling) I'll do this on both sides. All right, now it's time to build our trailer hitch. We are going to have our center section and then two outer arms here that are actually gonna bracket up to our frame rail. Now we wanna make sure we have these in the correct orientation, otherwise our hitch is not gonna fit. So if we look, we've got more of a slanted section for our driver's side and we wanna make sure that this L bracket right here is facing so that we're gonna be hitting the bottom and inner side of our frame rail. Now on the other side, it's a little bit different. We've got a straight shot right out, but we have this smaller section right here which is going to match up with our holes up above the cross tube. You can see just below it. So you might need an extra set of hands just to kind of help hold it, position it while you're getting it all bolted up. But we're gonna be using our three eigths cap head screws, or bolts, sorry, and then some flange nuts. So I'll start with this side here. I think, it's kind of awkward to do either way. So like I said, you might wanna have a couple other people. We're gonna do bolts from the outside in with our flange nut on the inside. Get that started. (metal clanking) Once we get a couple of bolts in, it'll help support the weight a bit more. (metal clanking) And then we'll just repeat this over on the other side. Now we're gonna use a 9/16ths socket and wrench or 14 millimeter if you don't have standard. And we'll just snug each one of these down and then we'll come back and torque them as well. (metal clanking) All right, now before we set our hitch up into place, I did want to kinda just go over the hardware. So we're gonna have some horizontal bolts that's gonna go through our frame rail. That's gonna be our half inch bolts here. We're gonna have a flat washer that's gonna go on the bolt side. Once we pass through that frame rail, we're gonna put on another flat washer and then our lock nut. And then for the vertical bolts for the two bolt holes are gonna be going into the weld nuts in the frame rail, we're gonna have our M10 bolts, a split lock washer, a flat washer, and then that'll just thread right into that weld nut. So at this point you're definitely gonna wanna grab a second set of hands because this is a little bit heavy and trying to hold it while also passing through your hardware can be a bit of a challenge, especially on our passenger side because there's a heat shield in the way right here, which is gonna try and fight us the whole way that we try and go here. So I'm gonna do this without the hitch in place just to kind of give you an idea of what I'm doing. So once I get the hitch up in there, we'll get our bolt here and the washer's gonna catch on our heat shield. So what I like to do is push it all the way to the end, pass the heat shield and then try and force my bolt through. But you can see even the bolt is scraping against our heat shield. They don't want you to cut it. You can still have it there, you're just gonna have to kind of force your way through. You may want to take just a hammer and a punch and kind of push it the rest of the way, but I'm gonna grab somebody else. We'll get our hitch up in place and then we can get our hardware in. Now I got our second set of hands here. I got Scott and he's gonna help me lift these up into place. And as we're doing that, we can start trying to pass through our hardware to help hold up the hitch. (metal clanking) Try and get this one in. Let's see. There we go. All right, I got that back one holding. So at this point I'm gonna use a punch or pry bar or something to kind of push that in a little bit more 'cause like I said, I'm catching that heat shield. It's just not one to let me pass through. (metal clanking) All right, now we'll throw on our flat washers and our lock nuts on both the passenger and driver's side and get the M10 bolts into here. But you may have to move this around. You can see we're kind of blocking the hole right now, so I need to shift the whole hitch back, get that better lined up. There we go. Let's see, our other side. Looks like we're good. So I'm gonna grab those bolts and we'll get our nuts on here. I like to tighten these ones up first. Have it draw to the frame and then I'll tighten down the side ones. Have it kind of stretch it out to fully seal it up against the frame rail. (drill whirring) All right, I've got all my hardware snugged down. Now it's time to come back with our torque wrench. Now, I don't know if I said this before, but with our M10 bolts, we're gonna be using that 17 millimeter socket. On the half inch bolts, we're gonna be using our 19 millimeter or three quarter inch. (drill whirring) With all of our hardware properly torqued, now all we have left is to reinstall our rubber isolators so that our exhaust can be supported once again, remove our Camstrap and then we need to put our spare tire back on and reel that back all the way up. We've also got some four pole wiring here that we installed for our neighbor. So we also wanna throw that on our trailer hitch, keep that up off the ground. We don't want that to drag and then tear up our connector and we gotta replace it. We'll also want to reinstall that plastic cover with those three plastic push pins and then two plastic nuts that'll go onto these two studs. (parts rattling) Well that's gonna do it for our look at and installation of the B&W Trailer Hitch Receiver here on our 2023 Hyundai Palisade. My name's Kevin, and if you still have some questions about what's gonna be the right trailer hitch receiver for your Hyundai Palisade, please feel free to reach out to us via our Ask The Experts link, a comment on this video or a phone call to our customer service department and we'd be happy to help you out on your journey.

Excellent hitch. I bought this because of the higher tongue weight rating, and it is solid, fit together perfectly. I'm an average size 66-year-old and was able to install it myself after watching the video, although I'm pretty sore now. I think it would be MUCH easier if the car was on a lift. Oh well, at least it was a good excuse to buy some new tools.
Product arrived in good shape, very well packed/protected. Install was straight forward, all parts fit well together.
Over delivered, item arrived a full month before promised.
When to gather just as in the video. A tip keep them cardboard from the box to use to support the muffler if your are doing this on the ground works much better.
It’s not installed yet
Do you have a question about this Trailer Hitch?
Info for this part was:
At etrailer we provide the best information available about the products we sell. We take the quality of our information seriously so that you can get the right part the first time. Let us know if anything is missing or if you have any questions.


Thank you! Your comment has been submitted successfully. You should be able to view your question/comment here within a few days.
Error submitting comment. Please try again momentarily.